How-to video: Using undo and redo

In our series of how-to videos, we will today show a really useful feature that does not apply to the end user, but is very helpful in the authoring tool. Undo and redo. Have a look below to see how this works.

This feature was completed in the spring of 2013 and together with real time feature (covered in a different video), this helps improving your productivity in the authoring tool.

If you have questions above the feature above or suggestions about new videos topics we should cover, be sure to let us know.

Proud of our customers

Today Dagbladet, the second largest Norwegian tabloid newspaper, wrote about two children apps. They usually write about apps for children about once per month. But what was special for us about the reviews this time? In fact both the apps featured were made with our tool!

Dagbladet September 9th 2013, two TapBookAuthor.com-made apps reviewed

The apps in question are both using the possibility of creating a brand-specific channel to the customer, using in-app-purchasing – a feature in our tool for somewhat more than half a year now. And the consumer gets a title for free, to evaluate before paying a single dime. Classical win-win?

Leseland from Samlaget helps people learn to read, with four different levels of difficulty, and uses the “karaoke mode” to highlight text along with a very slow voice. The entire logic of the menu, selection of different voices and images they did with absolutely no help from us, just using the standard features of the tool. Fun for us to see, even if we also like to help customers that prefer to be less hands-on.

Lesestart from Gyldendal is a similar bookshelf with a broader range of titles and a very polished bookshelf-with-store concept with what I personally think is a super looking design and great user experience.

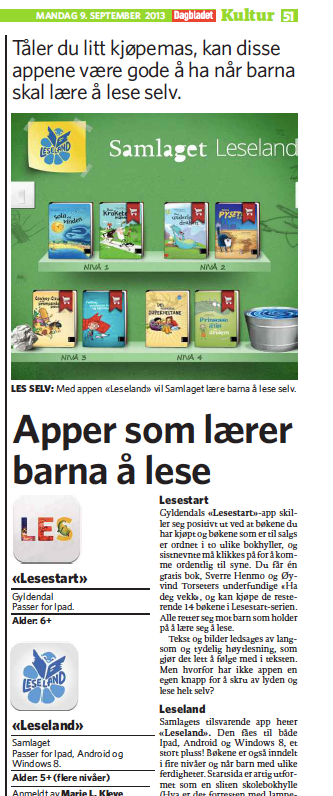
You can see part of the page from the newspaper here, and a similar article is now also online. The titles are in Norwegian.

How-to video: Using layers

In our series of how-to videos, we will today feature a video that shows how you can use layers – or “object categories” as the slightly engineering minded people at our company like to refer to them (there is a reason, but you might not need to know – we’ll get back to more advanced use of them later). You’ll find the video embedded below.

The layers lets you easily turn on and off visibility of sets of objects in the authoring tool, allowing you to focus on what you are doing at the moment. We’ll be back with another how-to video in less than a week. Please check back!

If you have questions above the feature shown above or suggestions about new videos topics we should cover, don’t hesitate letting us know.

How-to video: Showing the links between objects

In our series of how-to videos, we will today show how you can see the links between objects in your scene. Have a look below to see how this works.

You will see links between objects such as where to tap to play a particular sound or video. The color codes are assigned randomly and does not have any meaning apart from showing which objects belong together. If you have a very crowded scene, you can use the layers functionality (covered in a later video) in combination with this feature to see links between objects in the currently active layer.

If you have questions above the feature above or suggestions about new videos topics we should cover, be sure to let us know.